XXL Kit for Arduino · Choreography
Part 23 Keypad, LCD and stepper motor: a dance sequencer
- Beginner
- Ages 8+
- about 90 min
In Part 22 the dance was written in the code: to change it, you had to fix the array and flash the program again. In this part that is over. You type the dance routine on the keypad, watch it appear on the LCD as you go, and when you press the button, the stepper motor dances it. The buzzer plays along the way the motor dances: the faster the move, the higher the note. This is the finale of the ART section: the keypad from Part 20, the LCD from Part 17 and the motor from Part 22 in one device.
Who is it for? For children and teenagers aged 8 and up, for teachers, and for adults who have done Parts 17, 20 and 22: it helps to know the Keypad library, the LCD display with the I2C adapter and the stepper motor with the Stepper library.
01
From music box to sequencer
The music box played a dance that someone had written down earlier. A sequencer lets you make up the dance yourself, without a computer and without changing the code.
A sequencer is a device that remembers a series of commands and then carries them out one after another. In music, sequencers play programmed rhythms and melodies: you find them in recording studios and in DJs' drum machines. The same idea runs dancing fountain shows, concert lights and the movements of robots in factories. First someone lays out the steps, and then the machine repeats them to the letter.
Compared with the previous part:
| Music box (Part 22) | Sequencer (Part 23) | |
|---|---|---|
| Who makes up the dance | the programmer, in the code | anyone, on the keypad |
| Where it is stored | in the constant array MOVES[] | in arrays that fill up while the program runs |
| How to change the dance | fix the code and flash it again | press the button and type a new one |
| What the buzzer plays | a ready-made melody | a note that depends on the speed of the motor |
| What you see | only the dancer | the dancer and the whole routine on the LCD |
The program from Part 22 had its array fixed in the code. Here the arrays start empty, and what you type fills them. This is an important moment in learning to program: the program stops doing only what its author thought up and starts doing what the user thinks up.
02
The parts you will use
You already know all of them from earlier parts. Here is just a short reminder of what they look like and what they do.
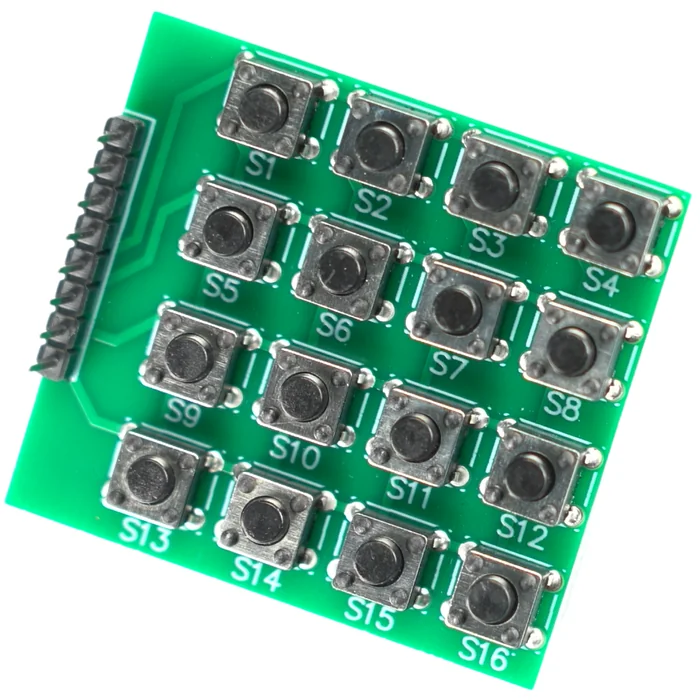
From the kit
4x4 matrix keypad
This is where you type the dance. Sixteen keys on eight pins, handled by the Keypad library. The full explanation is in Part 20.
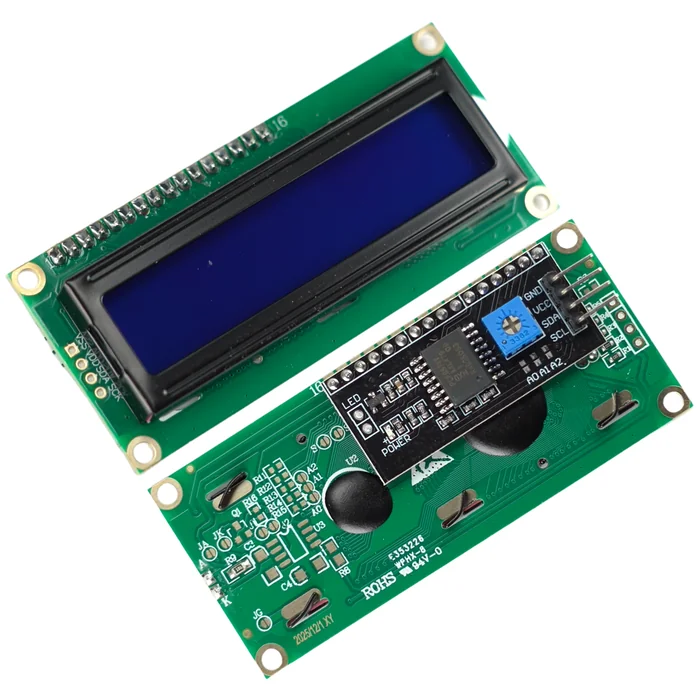
From the kit
2x16 LCD display with the I2C adapter
This is where you see the dance. Two lines of 16 characters, connected with just two signal wires (SDA and SCL), which come out at the back of the display, on the adapter. The full explanation is in Part 17.
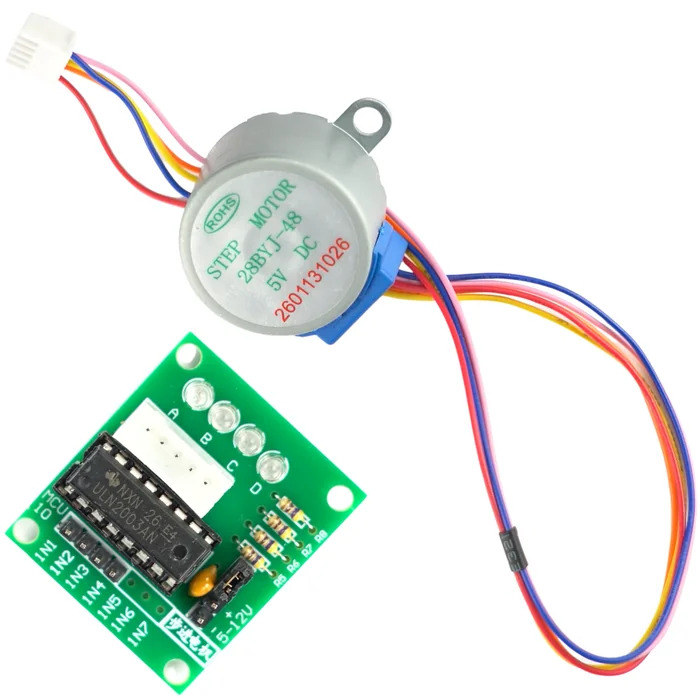
From the kit
28BYJ-48 stepper motor with the ULN2003 driver
It dances. 2048 steps per turn, as many turns as you like in both directions, at most about 15 turns per minute. Always through the driver. The full explanation and the comparison with the servo are in Part 22.
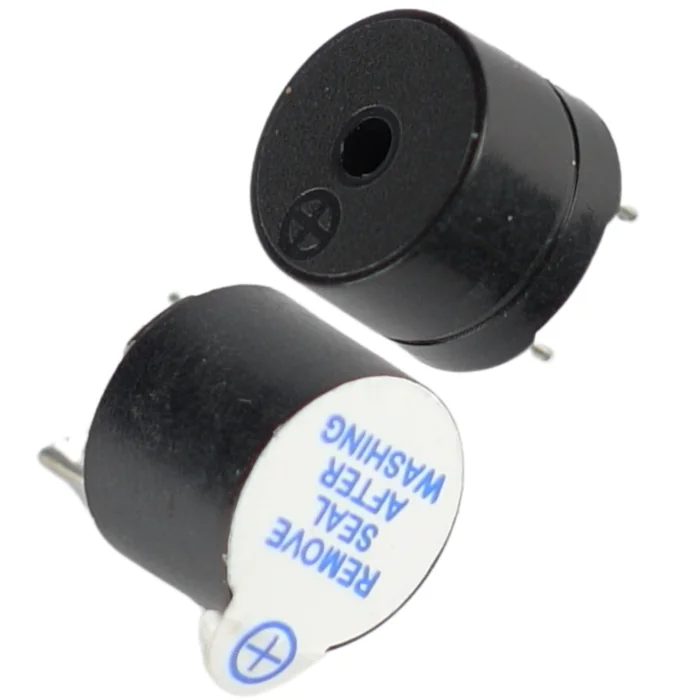
From the kit
Passive buzzer
It sings. tone() plays in the background until you call noTone(). It has to be the passive one: the active one always beeps with the same tone. The full explanation is in Part 6.
From the kit
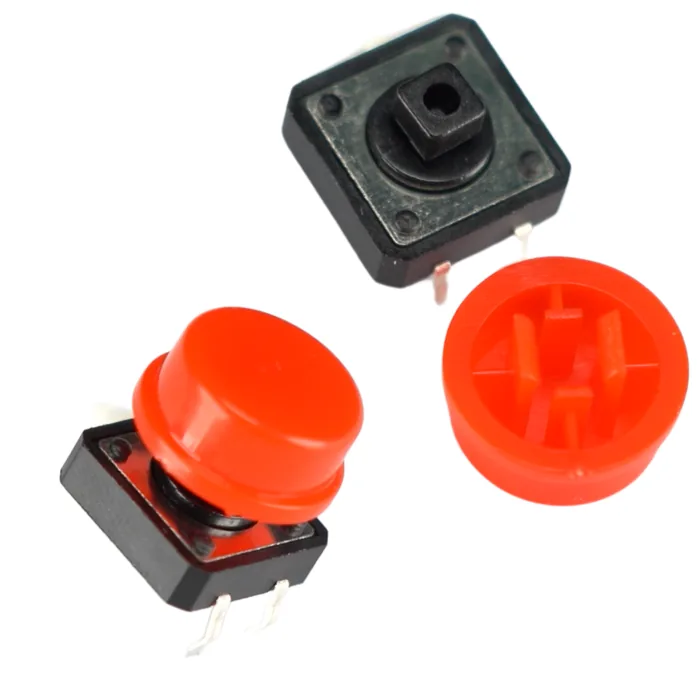
Tact switch (button)
Start and stop for making up the dance. Connected with INPUT_PULLUP: when pressed, it gives LOW. The full explanation is in Part 5.
The dancer is the same figurine you used in the previous part.
03
The language of dance
For the motor to understand what to do, every command must be built the same way: how fast, which way and how far.
Each command has three parts, typed one after another, and ends with the # key:
  5        A        90       #
  |        |        |        |
  |        |        |        +-- confirm the command
  |        |        +----------- how many degrees (90 = a quarter turn)
  |        +-------------------- which way (A = left, B = right)
  +----------------------------- speed from 1 to 9
| Key | Meaning |
|---|---|
1–9 at the start | speed: 1 is the slowest, 9 the fastest |
A | to the left: an arrow ← on the LCD |
B | to the right: an arrow → on the LCD |
| digits after the direction | how many degrees: 90 is a quarter turn, 360 a full turn, 999 at most |
# | confirm the command and start the next one |
* | undo: deletes the command you are typing, or the last saved one when you are not typing anything |
C | clear the whole dance |
| button | first press: start making up the dance; second press: dance it |
Why the #? Without it the keypad does not know where one command ends and the next one begins. If you typed 5 A 10 8 B 3, the program could not tell “turn by 10°, then speed 8” from “turn by 108°”. The # sign works like the full stop at the end of a sentence. Calculators, cash machines and door intercoms have an “OK” or “=” key for the same reason.
A dance can have at most 8 commands. On the display you will see:
  +----------------+
  |5←90 8→360      |   top line: the commands already saved
  |3: 2←4_         |   bottom line: the number and the command you are typing
  +----------------+
When the saved commands need more than 16 characters, the top line shows the end of the dance, just as a phone screen shows the last digits of a number you are typing.
The buzzer sings the way the motor dances. Each speed has its own note. A slow move is a low sound, a fast one is a high sound, and the speeds go up the scale from the piano in Part 20, one step at a time:
| Speed | Turns per minute | Note | Frequency |
|---|---|---|---|
| 1 | 2 | do | 523 Hz |
| 2 | 3 | re | 587 Hz |
| 3 | 4 | mi | 659 Hz |
| 4 | 5 | fa | 698 Hz |
| 5 | 6 | sol | 784 Hz |
| 6 | 7 | la | 880 Hz |
| 7 | 8 | si | 988 Hz |
| 8 | 10 | do | 1047 Hz |
| 9 | 12 | re | 1175 Hz |
The sound lasts exactly as long as the move. A 360° turn at speed 1 is half a minute of low “do”, and a 45° turn at speed 9 is a short, high “re”.
04
Building the circuit
Five parts need a lot of pins. There are not enough ordinary digital ones, so the analog pins come back as outputs: the trick from Part 10.
Let's count: the keypad takes 8 pins, the motor 4, the buzzer 1, the button 1, and the display takes the SDA and SCL pins. You connect the keypad the same way as in Part 20, to D2–D9. There are no digital pins left for the motor, so it goes to A0–A3, exactly like the rows and columns of the LED matrix in Part 10: pinMode(A0, OUTPUT) and digitalWrite(A0, HIGH) work there just as they do on D2. The Stepper library takes such pins without any trouble. Leave pins A4 and A5 free: on the R3 board they are, inside, the same lines as SDA and SCL, so the display is using them.
What you need: the R3 board, the 4x4 matrix keypad, the 2x16 LCD display with the I2C adapter, the 28BYJ-48 stepper motor with the ULN2003 driver, the passive buzzer, a tact switch, the breadboard, about 18 female-to-male jumper wires (the keypad, the LCD and the driver have pins that stick out), a few male-to-male jumper wires and one male-to-male jumper wire for the dancer.
| Part | Pin | Board pin | Note |
|---|---|---|---|
| Keypad | C4, C3, C2, C1 | D9, D8, D7, D6 | as in Part 20 |
| Keypad | R1, R2, R3, R4 | D5, D4, D3, D2 | as in Part 20 |
| ULN2003 driver | IN1 | A3 | analog pin as an output |
| ULN2003 driver | IN2 | A2 | – |
| ULN2003 driver | IN3 | A1 | – |
| ULN2003 driver | IN4 | A0 | – |
| ULN2003 driver | + | “+” rail (5 V) | power jumper in place |
| ULN2003 driver | - | “–” rail (GND) | – |
| LCD (I2C adapter) | VCC | “+” rail (5 V) | – |
| LCD (I2C adapter) | GND | “–” rail (GND) | – |
| LCD (I2C adapter) | SDA | the SDA pin of the R3 board | – |
| LCD (I2C adapter) | SCL | the SCL pin of the R3 board | – |
| Passive buzzer | “+” (or the longer leg) | D10 | as in Part 20 |
| Passive buzzer | “–” | “–” rail (GND) | – |
| Tact switch | one leg | D11 | INPUT_PULLUP |
| Tact switch | leg diagonally opposite | “–” rail (GND) | – |
  KEYPAD (as in Part 20):
  pin order on the plug:  C4  C3  C2  C1  R1  R2  R3  R4
  connect them in turn:   D9  D8  D7  D6  D5  D4  D3  D2

  ULN2003 DRIVER (motor in its socket):
  A3 --- IN1      A2 --- IN2      A1 --- IN3      A0 --- IN4
  "+" from the "+" rail,  "-" from the "-" rail

  LCD (I2C adapter):
  SDA --- SDA     SCL --- SCL     VCC from "+",  GND from "-"

  BUZZER:    D10 --| buzzer |-- GND
  BUTTON:    D11 --[ button ]-- GND

  POWER THE RAILS:  5V --- "+" rail     GND --- "-" rail
This is the whole circuit on the wiring diagram:
Step-by-step assembly
Build the circuit on the breadboard
Loading the 3D view...
Power the rails of the breadboard
With one jumper wire connect the 5V pin of the R3 board to the “+” rail, and with another the GND pin to the “–” rail.
Three parts (the driver, the LCD, the buzzer with the button) need 5 V and ground, and the R3 board has only one 5 V pin. That is why this time the power goes through the rails of the breadboard, as in Part 17.
Order of assembly:
- 1Power the rails of the breadboard: one jumper wire from the 5 V pin of the R3 board to the “+” rail, another from the GND pin to the “–” rail.
- 2Connect the keypad as in Part 20: the eight pins in turn to D9, D8, D7, D6, D5, D4, D3, D2.
- 3Plug the motor into the socket of the driver and check the power jumper. Connect
IN1–IN4to pins A3, A2, A1, A0, and the+and-of the driver to the rails. - 4Connect the display:
VCCto the “+” rail,GNDto the “–” rail,SDAto the SDA pin andSCLto the SCL pin of the R3 board. - 5Plug in the buzzer: “+” to D10, “–” to the “–” rail.
- 6Plug in the button straddling the groove of the breadboard: one leg to D11, the leg diagonally opposite to the “–” rail.
- 7Wrap the wire dancer around the shaft of the motor.
- 8Check everything once more. Only now plug in the USB cable.
05
The program step by step
The program has three tasks: take the commands from the keypad, show them on the LCD and dance them. Each task is a separate function.
You need three libraries you already know: Keypad (Part 20), LiquidCrystal_I2C (Part 17) and the built-in Stepper library (Part 22). All three have already been added to the project of this lesson in the editor next to it.
#include <Wire.h>                // I2C communication - as in Part 17
#include <LiquidCrystal_I2C.h>   // LCD display - as in Part 17
#include <Keypad.h>              // keypad - as in Part 20
#include <Stepper.h>             // stepper motor - as in Part 22

// ---------- KEYPAD (exactly as in Part 20) ----------
const byte ROW_COUNT = 4;
const byte COLUMN_COUNT = 4;

char keyMap[ROW_COUNT][COLUMN_COUNT] = {
  {'1','2','3','A'},
  {'4','5','6','B'},
  {'7','8','9','C'},
  {'*','0','#','D'}
};

byte rowPins[ROW_COUNT] = {5, 4, 3, 2};         // R1, R2, R3, R4
byte columnPins[COLUMN_COUNT] = {6, 7, 8, 9};   // C1, C2, C3, C4

Keypad keypad = Keypad(makeKeymap(keyMap), rowPins, columnPins, ROW_COUNT, COLUMN_COUNT);

// ---------- DISPLAY (as in Part 17) ----------
LiquidCrystal_I2C lcd(0x27, 16, 2);   // I2C address, columns, rows

// ---------- MOTOR (as in Part 22, but on pins A0-A3) ----------
const int STEPS_PER_TURN = 2048;
Stepper motor(STEPS_PER_TURN, A3, A1, A2, A0);   // IN1, IN3, IN2, IN4

const int buzzerPin = 10;
const int buttonPin = 11;

// Speed 1-9 turned into turns per minute (element 0 is not used)
const int TURNS[10] = {0, 2, 3, 4, 5, 6, 7, 8, 10, 12};

// Speed 1-9 turned into a note: the faster the move, the higher the sound
//                       do   re   mi   fa   sol  la   si   do    re
const int NOTES[10] = {0, 523, 587, 659, 698, 784, 880, 988, 1047, 1175};

// In the memory of the display, number 127 is an arrow to the left, 126 - to the right
const char ARROW_LEFT  = 127;
const char ARROW_RIGHT = 126;

// ---------- THE SAVED DANCE ----------
const int MAX_COMMANDS = 8;
int  speeds[MAX_COMMANDS];       // 1-9
char directions[MAX_COMMANDS];   // 'L' or 'R'
int  angles[MAX_COMMANDS];       // 1-999
int  commandCount = 0;

// ---------- THE COMMAND YOU ARE TYPING RIGHT NOW ----------
int  newSpeed = 0;         // 0 = not typed yet
char newDirection = ' ';   // ' ' = not chosen yet
int  newAngle = 0;         // 0 = not typed yet

bool editing = false;         // true = we are making up the dance now
int  previousButton = HIGH;   // to catch the moment of the press

// ================= HELPER FUNCTIONS =================

// Turns off all four coils - the motor rests and does not heat up
void turnOffCoils() {
  digitalWrite(A0, LOW);
  digitalWrite(A1, LOW);
  digitalWrite(A2, LOW);
  digitalWrite(A3, LOW);
}

// Starts typing a new command from zero
void clearNew() {
  newSpeed = 0;
  newDirection = ' ';
  newAngle = 0;
}

// Turns one command into a short text, for example 5<-90
String describeCommand(int speed, char direction, int amount) {
  String text = "";
  if (speed > 0)        text += speed;
  if (direction == 'L') text += ARROW_LEFT;
  if (direction == 'R') text += ARROW_RIGHT;
  if (amount > 0)       text += amount;
  return text;
}

// Prints the text in the chosen row and pads it with spaces to 16 characters,
// so that no leftovers of the old text stay on the screen
void printLine(int row, String text) {
  while (text.length() < 16) {
    text += ' ';
  }
  lcd.setCursor(0, row);
  lcd.print(text);
}

void showStart() {
  printLine(0, "Dance sequencer");
  printLine(1, "Button = start");
}

// Top line: the saved commands. Bottom line: what you are typing right now.
void showEditing() {
  String danceText = "";
  for (int i = 0; i < commandCount; i++) {
    danceText += describeCommand(speeds[i], directions[i], angles[i]);
    danceText += ' ';
  }
  if (commandCount == 0) {
    danceText = "Type a dance:";
  }
  if (danceText.length() > 16) {   // it does not fit - show the end
    danceText = danceText.substring(danceText.length() - 16);
  }
  printLine(0, danceText);

  if (commandCount == MAX_COMMANDS) {
    printLine(1, "Full! Button");
  } else {
    printLine(1, String(commandCount + 1) + ": " + describeCommand(newSpeed, newDirection, newAngle) + "_");
  }
}

// Adds the typed command to the dance - but only when it is complete
void saveNew() {
  if (newAngle > 0 && commandCount < MAX_COMMANDS) {
    speeds[commandCount]     = newSpeed;
    directions[commandCount] = newDirection;
    angles[commandCount]     = newAngle;
    commandCount++;
  }
  clearNew();
}

// ================= THREE MAIN TASKS =================

// TASK 1: take one key and add it to the command
void handleKey(char k) {
  tone(buzzerPin, 2000, 20);   // a short "click" - you hear that the key worked

  if (newSpeed == 0) {
    // stage 1: we wait for the speed 1-9
    if (k >= '1' && k <= '9') {
      newSpeed = k - '0';   // turns the character '5' into the number 5
    }
  } else if (newDirection == ' ') {
    // stage 2: we wait for the direction
    if (k == 'A') newDirection = 'L';
    if (k == 'B') newDirection = 'R';
  } else if (k >= '0' && k <= '9') {
    // stage 3: the next digits of the degrees, three at most
    if (newAngle < 100) {
      newAngle = newAngle * 10 + (k - '0');
    }
  }

  if (k == '#') {
    saveNew();
  }
  if (k == '*') {
    if (newSpeed > 0) {
      clearNew();        // deletes the command you are typing right now
    } else if (commandCount > 0) {
      commandCount--;    // deletes the last saved one
    }
  }
  if (k == 'C') {
    commandCount = 0;
    clearNew();
  }
}

// TASK 2: dance the whole saved routine
void dance() {
  for (int i = 0; i < commandCount; i++) {
    printLine(0, "Dance " + String(i + 1) + "/" + String(commandCount));
    printLine(1, describeCommand(speeds[i], directions[i], angles[i]));

    long steps = (long)angles[i] * STEPS_PER_TURN / 360;   // degrees -> steps
    if (directions[i] == 'L') {
      steps = -steps;
    }

    motor.setSpeed(TURNS[speeds[i]]);
    tone(buzzerPin, NOTES[speeds[i]]);   // the buzzer sings the way the motor dances
    motor.step(steps);                   // the program waits until the move is finished
    noTone(buzzerPin);
    delay(150);                          // a short breath between the moves
  }
  turnOffCoils();
}

// ================= SETUP AND LOOP =================

void setup() {
  pinMode(buzzerPin, OUTPUT);
  pinMode(buttonPin, INPUT_PULLUP);
  lcd.init();
  lcd.backlight();
  showStart();
}

void loop() {
  // TASK 3: the button switches between making up the dance and dancing it
  int button = digitalRead(buttonPin);

  if (button == LOW && previousButton == HIGH) {   // the moment of the press
    if (!editing) {
      commandCount = 0;       // a new dance from zero
      clearNew();
      editing = true;
      showEditing();
    } else {
      saveNew();              // save the command, in case you forgot the #
      editing = false;
      if (commandCount > 0) {
        dance();
      }
      showStart();
    }
    delay(50);   // wait out the contact bounce of the button
  }
  previousButton = button;

  if (editing) {
    char pressedKey = keypad.getKey();
    if (pressedKey != NO_KEY) {
      handleKey(pressedKey);
      showEditing();   // the LCD is refreshed after every key
    }
  }
}
Write this program in your browser
Tutorial on the left, editor on the right. Build your code and flash it to the board in one click, with nothing to install.
| Instruction | What it does |
|---|---|
Stepper motor(2048, A3, A1, A2, A0) | the motor on analog pins – the order IN1, IN3, IN2, IN4 as in Part 22 (Where you know it from: Part 22) |
speeds[], directions[], angles[] | three arrays read in parallel, like MELODY[], DURATIONS[] and MOVES[] in the music box, only filled from the keypad (Where you know it from: Part 22) |
newSpeed == 0, newDirection == ' ' | check which stage of typing a command you are at – what a pressed digit means depends on it (Where you know it from: new in this part) |
k - '0' | turns the character of a digit into a number: the character '5' minus the character '0' gives the number 5 (Where you know it from: new in this part) |
newAngle * 10 + (k - '0') | adds a digit to the end of the number: pressing 0 turns 9 into 90 (Where you know it from: new in this part) |
NOTES[speeds[i]] | the same speed picks the turns of the motor and the pitch of the sound – that is why the buzzer “sings” the way the motor dances (Where you know it from: Part 20) |
(long)angles[i] * 2048 / 360 | converts degrees to steps: 90° is 512 steps (Where you know it from: Part 22) |
String, += | glues the text for the LCD together from pieces: digits, arrows and spaces (Where you know it from: new in this part) |
danceText.substring(…) | cuts the last 16 characters out of the text when the whole dance does not fit (Where you know it from: new in this part) |
button == LOW && previousButton == HIGH | catches just the moment of the press, not the whole time the button is held (Where you know it from: “remember and compare” from Part 8, taken further) |
This program uses the libraries LiquidCrystal I2C 1.1.2, Keypad 3.1.1, Stepper 1.1.3. They are already added to the project in the editor next to the lesson.
Flash the code to the board through FlashESP.com, as in the earlier parts. The screen will show Dance sequencer.
Why this works as the finale of the section. Compare dance() with playAndDance() from Part 22. It is almost the same loop: a note in the background, a move, silence, the next step. The only difference is where the numbers come from. In the music box, the author of the program typed them in. Here you typed them in yourself, a moment ago, on the keypad.
While the motor dances, the program does not read the keypad or the button: motor.step() holds it until the move is finished. So once a long dance starts, you have to watch it to the end.
06
The first show
A few ready-made routines to warm up. Before each one, press the button, type the routine and press the button again.
| Routine | What to type | What you will see and hear |
|---|---|---|
| Lullaby | 2A45# 2B90# 2A45# | slow rocking from side to side to a low “re” |
| Pirouette | 9B360# | a full turn at the top speed, with the highest note |
| Stairs | 1B90# 3B90# 5B90# 7B90# 9B90# | every step is faster and sounds higher: do, mi, sol, si, re |
| Scale | 1B45# 2B45# 3B45# 4B45# 5B45# 6B45# 7B45# 8B45# | the motor “plays” the whole do-re-mi-fa-sol-la-si-do scale and makes exactly one full turn on the way |
| There and back | 5B180# 5A180# | half a turn to the right, half to the left: the dancer comes back exactly to the start |
In the scale, eight commands of 45° add up to exactly 360°, so the dancer ends where it started. The slow notes also last longer than the fast ones, so you will hear the scale speed up.
Now it's your turn: make up a dance, show it to someone and ask them to guess, from the sound alone, where the motor slows down and where it speeds up.
Build checklist
Tick them off one by one. Your progress is saved in this browser.
0 / 20
Rules worth remembering
- 1
A stepper motor always goes through the ULN2003 driver.
Never connect the wires of the motor straight to the pins of the Arduino, not even to pins A0–A3.
- 2
Under load, a separate 5 V power supply.
A wire dancer will manage on the 5 V pin of the board. If something heavier goes on the shaft, the motor needs its own 5 V source, with its ground connected to the ground of the Arduino. Do not connect the 9 V battery to the driver: the motor in the kit is made for 5 V.
- 3
Pins A4 and A5 are taken by the display.
On the R3 board they are the same lines as
SDAandSCL. Do not connect anything else to them, or the LCD will stop working. - 4
We rewire the circuit with the power disconnected.
Five parts mean a dozen or more wires. Pull out the USB cable, move the wires, check once more and only then plug it back in.
Projects
None of the projects below needs anything extra: everything is already in the kit. They go roughly from the easiest to the most ambitious.
- 1
Encore!
Easy- What you will use
- this circuit
- What you will learn
- adding a key (for example
D) that repeats the last dance without typing it in again
- 2
Back to the start
Easy- What you will use
- this circuit
- What you will learn
- adding up the steps in a
positionvariable, as in the music box from Part 22, and moving the dancer back to its place after the dance
- 3
A pause in the dance
Medium- What you will use
- this circuit
- What you will learn
- adding a new kind of command (for example direction
0) in which the motor stands still and the buzzer stays silent for the given number of tenths of a second
- 4
A dance on repeat
Medium- What you will use
- this circuit
- What you will learn
- repeating the whole routine until you hold down the button, and checking the button between the commands
- 5
A dance saved for good
Challenging- What you will use
- this circuit + EEPROM from Part 14
- What you will learn
- saving the dance arrays in permanent memory, so that the routine survives being unplugged
- 6
Dancing with the music box
Challenging- What you will use
- this circuit + the arrays from Part 22
- What you will learn
- joining both parts: key
Dplays the ready-made choreography to “Wlazł kotek”, and the button plays your own
Summary
The finale of the ART section brought together everything you met in it: the keypad from the piano, the scale of notes, the stepper motor from the music box and the LCD display from Part 17. But the most important change is not in the hardware. It is in the program: the arrays that were fixed in the code of the music box are filled in here by the user. On the way you learned to build a number from single digits, to glue text together for the display, to recognize the stages of typing a command and to use analog pins as ordinary outputs. A buzzer that sings the way the motor dances closes a section that began with single notes: sound, light and movement in one device, controlled by someone who does not need to know a single line of code.