XXL Kit for Arduino · Music
Part 20 A matrix keypad and a buzzer: an electronic piano
- Beginner
- Ages 8+
- about 60 min
Sixteen buttons hide behind eight pins. In this part you connect the matrix keypad and teach the Arduino to recognize which key was pressed. The passive buzzer from Part 6 turns those presses into sound: keys 1–8 play the scale you know from school, do-re-mi-fa-sol-la-si-do. This is the first part of the ART section. Here we join an input (the keypad) and an output (sound) into one small instrument.
Who is it for? For children and teenagers aged 8 and up, for teachers, and for adults who have done Parts 6, 10 and 16: it helps to know external libraries, the tone() function and the idea of scanning “row by row” from the LED matrix.
01
The keypad turns into an instrument
Sixteen buttons, one buzzer, zero new actuators. This time the only question is how to read which of the sixteen keys was pressed.
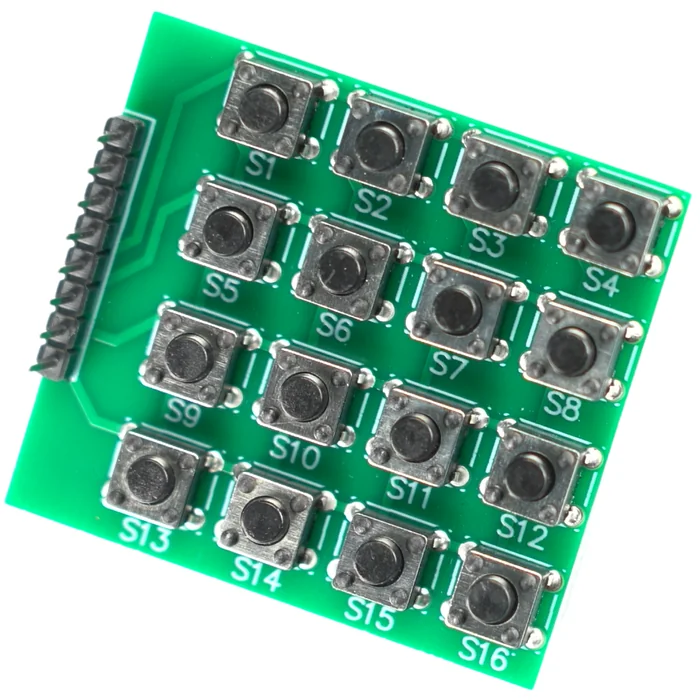
In front of you there are sixteen identical, unmarked buttons laid out in a 4×4 square. The board has only the numbers S1–S16 printed next to them, and those just count the buttons. You give them a meaning yourself, in the code: just like on a classic phone keypad, you will give them the digits 0–9, the signs * and # and the letters A–D. In this part only eight of them get a sound: keys 1–8 play the eight notes of the scale: do, re, mi, fa, sol, la, si, do. The other keys (9, 0, *, #, A–D) stay silent for now. They will come back later in the series, when the same keypad opens a lock with a PIN code.
The way the keypad works is the reverse of what you did with the LED matrix in Part 10. There the Arduino lit one row of LEDs at a time and switched quickly between the rows. Here the Arduino checks one row of keys at a time and looks for the column where something has just closed. It is the same “row by row” trick, only the other way round: an input instead of an output.
02
The 16-key matrix keypad
A part from the catalog in Part 1 (item 19). Now, for the first time, you really connect it.
From the kit
4×4 matrix keypad (16 keys)
Sixteen buttons, eight pins. The keys are not connected one by one. They are laid out in a grid of four rows and four columns, and the Arduino works out which of the sixteen is pressed by checking which row touches which column.
The eight pins of the keypad are four rows (R1–R4) and four columns (C1–C4). None of them has a polarity, so you will not break anything by connecting them in the wrong order. On the module from this kit the eight pins come out in one line, in the order C4, C3, C2, C1, R1, R2, R3, R4. Thanks to that you connect them one after another to eight neighboring pins of the R3 board, without guessing which is which. If your module has a different order, the section “The program step by step” has a quick diagnostic test that will find it.
03
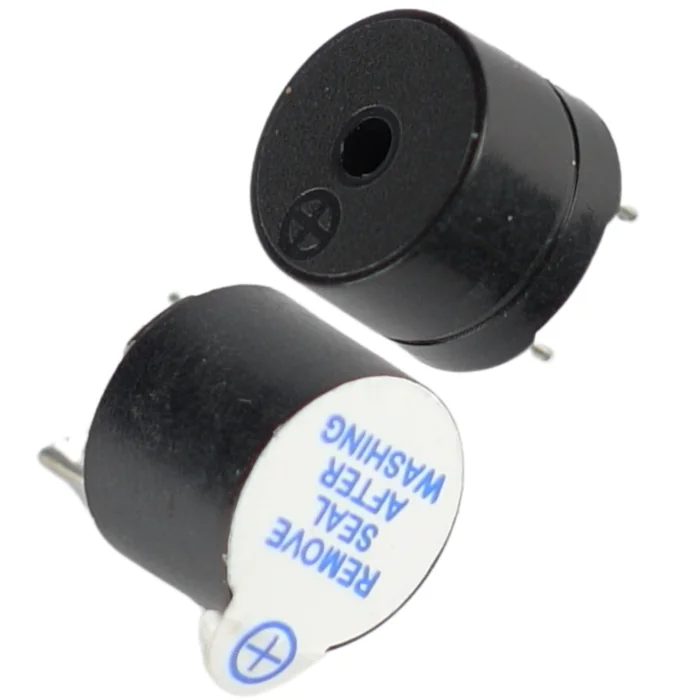
Reminder: the passive buzzer
You got to know this part fully in Part 6. Here is just a quick refresher.
From the kit
Passive buzzer
It makes no sound by itself. The function tone(pin, frequency) turns the pin into a wave of the pitch you ask for, and noTone(pin) switches it off. The full explanation of the difference between an active and a passive buzzer is in Part 6.
For this project you need the passive buzzer. Only it can play more than one fixed sound. The active one has a built-in generator and always beeps the same way, whatever frequency you give it.
04
The Keypad library
You could program the scanning of sixteen keys, row by row, yourself. But somebody has already done it, tested it and packed it into a ready-made library.
To work with the keypad you need the Keypad library. Like MFRC522 in Part 16 or SimpleDHT in Part 17, it has already been added to the project of this lesson in the editor next to it. It is one of the most popular libraries in the whole Arduino world for exactly this kind of matrix keypad.
The library does three things for you. It scans the rows and columns in the background. It filters out the tiny “bounces” of the contacts (exactly the problem you solved by hand with the button in Part 5). And it turns the result into an ordinary character, '1', 'A', '*', instead of the numbers of the pins where something closed. You will use it both in the test below and in the finished piano.
05
Building the circuit
Eight pins of the keypad plus one pin of the buzzer, and no extra resistors at all.
What you need: the R3 board, the 4×4 matrix keypad, the passive buzzer, 8 female-to-male jumper wires (the keypad's pins are its own soldered-on legs, so you connect to them with the female end of the wire), 2 male-to-male jumper wires for the buzzer. The breadboard is optional here: you can plug the buzzer straight into the R3 board.
| Part | Leg / pin | Goes to | Note |
|---|---|---|---|
| Keypad | C4 | D9 | first pin on the connector |
| Keypad | C3 | D8 | – |
| Keypad | C2 | D7 | – |
| Keypad | C1 | D6 | – |
| Keypad | R1 | D5 | – |
| Keypad | R2 | D4 | – |
| Keypad | R3 | D3 | – |
| Keypad | R4 | D2 | eighth and last pin on the connector |
| Buzzer | “+” (or the longer leg) | D10 | signal from tone() |
| Buzzer | “–” | GND | – |
  MATRIX KEYPAD (8 pins in one line, no polarity):
  order of pins on the connector: C4  C3  C2  C1  R1  R2  R3  R4
  connect them in order to:       D9  D8  D7  D6  D5  D4  D3  D2

  BUZZER (sound):
  D10 --| buzzer |-- GND      "+" (or the longer leg) on the side of pin D10
This is the whole circuit on the wiring diagram:
Step-by-step assembly
Build the circuit on the breadboard
Loading the 3D view...
Put the keypad next to the R3 board
Eight pins stick out of the side of the keypad, in the order C4, C3, C2, C1, R1, R2, R3, R4.
Order of assembly:
- 1Find the eight pins that stick out of the keypad: in one line on the side of the module, in the order
C4, C3, C2, C1, R1, R2, R3, R4. - 2With female-to-male jumper wires connect these eight pins one after another to pins D9, D8, D7, D6, D5, D4, D3, D2, also in order, pin by pin.
- 3Plug in the buzzer: connect the “+” leg (or the longer one) with a jumper wire to pin D10, and the other leg to the GND pin of the R3 board.
- 4Check everything once more. Only now plug in the USB cable.
06
The program step by step
First you check that the keypad “says” what it should, and only then you add the sound.
The key mapping test: do this first. Before you add the buzzer, check that every physical key sends exactly the character you expect:
#include <Keypad.h>   // library added through Manage Libraries

const byte ROW_COUNT = 4;
const byte COLUMN_COUNT = 4;

// The characters we give to the sixteen buttons. They are our own labels -
// the keypad itself has no digits or letters on it, only the numbers S1-S16.
char keyMap[ROW_COUNT][COLUMN_COUNT] = {
  {'1','2','3','A'},
  {'4','5','6','B'},
  {'7','8','9','C'},
  {'*','0','#','D'}
};

byte rowPins[ROW_COUNT] = {5, 4, 3, 2};         // R1, R2, R3, R4
byte columnPins[COLUMN_COUNT] = {6, 7, 8, 9};   // C1, C2, C3, C4

// The library takes care of scanning these eight pins by itself
Keypad keypad = Keypad(makeKeymap(keyMap), rowPins, columnPins, ROW_COUNT, COLUMN_COUNT);

void setup() {
  Serial.begin(9600);
}

void loop() {
  char pressedKey = keypad.getKey();   // NO_KEY when nothing has been pressed

  if (pressedKey != NO_KEY) {
    Serial.print("Pressed: ");
    Serial.println(pressedKey);
  }
}
The keypad has no digits or letters printed on it. The only markings on the board are the button numbers S1–S16. The characters 1–9, *, 0, #, A–D are our own labels from the keyMap array, not something printed on the module. Before you start the test, work out which character to expect for each button number:
| S1 | S2 | S3 | S4 |
|---|---|---|---|
1 | 2 | 3 | A |
| S5 | S6 | S7 | S8 |
|---|---|---|---|
4 | 5 | 6 | B |
| S9 | S10 | S11 | S12 |
|---|---|---|---|
7 | 8 | 9 | C |
| S13 | S14 | S15 | S16 |
|---|---|---|---|
* | 0 | # | D |
Flash the code, open the Serial Monitor (the “Serial Monitor” tab below the editor, speed 9600 baud, as in Part 16) and press all sixteen buttons one after another. Compare each printed character with the table above for the matching S number. If everything matches, great: you can move on. If a button prints the wrong character or nothing happens, the rows and columns are mixed up or in a different order. Change the order of the numbers in the rowPins and columnPins arrays (without moving a single jumper wire) and flash the test again.
When the test matches, flash the final program:
#include <Keypad.h>   // library added through Manage Libraries

const byte ROW_COUNT = 4;
const byte COLUMN_COUNT = 4;

// The characters given to the buttons - the same as in the test above
char keyMap[ROW_COUNT][COLUMN_COUNT] = {
  {'1','2','3','A'},
  {'4','5','6','B'},
  {'7','8','9','C'},
  {'*','0','#','D'}
};

byte rowPins[ROW_COUNT] = {5, 4, 3, 2};         // R1, R2, R3, R4
byte columnPins[COLUMN_COUNT] = {6, 7, 8, 9};   // C1, C2, C3, C4

Keypad keypad = Keypad(makeKeymap(keyMap), rowPins, columnPins, ROW_COUNT, COLUMN_COUNT);

const int buzzerPin = 10;

void setup() {
  pinMode(buzzerPin, OUTPUT);
}

// Turns the character of a key into the frequency of a sound in hertz.
// Returns 0 for the keys that do not play in this project.
int pickNote(char pressedKey) {
  switch (pressedKey) {
    case '1': return 523;    // do
    case '2': return 587;    // re
    case '3': return 659;    // mi
    case '4': return 698;    // fa
    case '5': return 784;    // sol
    case '6': return 880;    // la
    case '7': return 988;    // si
    case '8': return 1047;   // do, one octave higher
    default:  return 0;      // 9, 0, *, # and A-D - silence for now
  }
}

void loop() {
  char pressedKey = keypad.getKey();   // a character only at the moment of pressing, then NO_KEY

  if (pressedKey != NO_KEY) {
    int frequency = pickNote(pressedKey);

    if (frequency > 0) {
      tone(buzzerPin, frequency);   // once started, it keeps playing by itself
    }
  }

  // The only moment when we silence the buzzer: the key has just been released
  if (keypad.getState() == RELEASED) {
    noTone(buzzerPin);
  }
}
Write this program in your browser
Tutorial on the left, editor on the right. Build your code and flash it to the board in one click, with nothing to install.
| Instruction | What it does |
|---|---|
keypad.getKey() | returns the character of a key at the moment it is pressed – only once, at the very start of the press; for the rest of the time you hold the key it returns NO_KEY |
pickNote(pressedKey) | turns the character into a frequency – the switch from Part 3, where every line reads like “this key plays this note” |
return 0 in default | an agreed way of saying “this key has no note”, which is why in loop() we play only when frequency > 0 |
tone(buzzerPin, frequency) | starts the sound and keeps playing by itself, without a break, until something calls noTone() – you do not have to refresh it on every pass of loop() |
keypad.getState() | returns the state of the key that was handled last: PRESSED, HOLD, RELEASED or IDLE |
keypad.getState() == RELEASED | true only in the one pass of loop() in which the key has just been released – exactly then we switch the sound off |
This program uses the library Keypad 3.1.1. It is already added to the project in the editor next to the lesson.
Flash the code to the board through FlashESP.com, as in the earlier parts. Hold down key 1 and you will hear “do”. Key 8 gives the same “do”, only an octave higher. Play 1 2 3 4 5 6 7 8 in order and you will hear the scale you know from school: do, re, mi, fa, sol, la, si, do.
The frequencies in pickNote() are higher than the “middle C” from a music textbook, and that is no accident. In Part 6 you met the small piezo buzzers from the kit as playing in the range 100–2000 Hz. But in the lower part of that range (below 500 Hz) they play very weakly, at times too quietly to hear. A higher octave sounds clearly louder on the same buzzer.
A version for all 16 buttons. Eight keys stay silent, and that is a pity if you want to play real melodies. This snippet spreads two full octaves over the whole keypad, and the notes rise exactly the way you read: from left to right, from top to bottom.
| S1 | S2 | S3 | S4 |
|---|---|---|---|
| do | re | mi | fa |
| S5 | S6 | S7 | S8 |
|---|---|---|---|
| sol | la | si | do |
| S9 | S10 | S11 | S12 |
|---|---|---|---|
| re | mi | fa | sol |
| S13 | S14 | S15 | S16 |
|---|---|---|---|
| la | si | do | re |
Replace the whole pickNote() function with this one. The rest of the program stays as it is:
// Two octaves on 16 buttons. The notes rise in the order you read
// the keypad: from left to right, from top to bottom.
int pickNote(char pressedKey) {
  switch (pressedKey) {
    case '1': return 523;    // do
    case '2': return 587;    // re
    case '3': return 659;    // mi
    case 'A': return 698;    // fa
    case '4': return 784;    // sol
    case '5': return 880;    // la
    case '6': return 988;    // si
    case 'B': return 1047;   // do - one octave higher
    case '7': return 1175;   // re
    case '8': return 1319;   // mi
    case '9': return 1397;   // fa
    case 'C': return 1568;   // sol
    case '*': return 1760;   // la
    case '0': return 1976;   // si
    case '#': return 2093;   // do - two octaves above the start
    case 'D': return 2349;   // re
    default:  return 0;      // nothing gets here any more - all the keys play
  }
}
The last row beeps really high. It is still in the range where the piezo buzzer from the kit plays loudly, but close to your ear it can get tiring.
Build checklist
Tick them off one by one. Your progress is saved in this browser.
0 / 12
Rules worth remembering
- 1
The buzzer must be passive.
An active one has a built-in generator and will always make the same sound, whatever frequency you give in
tone(). - 2
We rewire the circuit with the power disconnected.
Pull out the USB, move the wires, check once more and only then plug it back in.
- 3
Mixed-up rows and columns are fixed in the code, not in the wires.
Swapping two numbers in the
rowPinsorcolumnPinsarray is quicker and safer than bending the legs of the keypad.
Projects
None of the projects below needs anything extra: everything is already in the kit. They go roughly from the easiest to the most ambitious.
- 1
A doorbell
Easy- What you will use
- the keypad + the buzzer
- What you will learn
- playing a ready-made sequence of notes from an array after one press
- 2
A press counter
Easy- What you will use
- the keypad
- What you will learn
- counting events in a variable, with no sound at all
- 3
A metronome controlled by the keypad
Medium- What you will use
- the keypad + the buzzer
- What you will learn
- setting the tempo of a regular beep with the
millis()function, withoutdelay()
- 4
A melody recorder and player
Medium- What you will use
- the keypad + the buzzer
- What you will learn
- saving a sequence of presses in an array and playing it back on demand
- 5
An octave switch
Challenging- What you will use
- the keypad + the buzzer
- What you will learn
- using a flag variable that lets one key (for example
D) move the whole piano an octave up and down
- 6
A melody saved for good
Challenging- What you will use
- the keypad + the buzzer + EEPROM from Part 14
- What you will learn
- saving data that survives when the power is disconnected
Summary
This part joined an input with an output. The matrix keypad from Part 1 finally got connected to the board, and the Keypad library did the scanning of the eight pins for you: first in the test, confirming all sixteen characters in one go, and then in the piano itself. The secret of a lasting sound turned out to be simpler than it looked: tone() keeps playing by itself until you call noTone(). It was enough to catch the moment the key is released (getState() == RELEASED) instead of refreshing the sound on every pass of loop(). The passive buzzer from Part 6 turned the presses into real notes: the first true “instrument” in this series. The keys 9, 0, *, # and A–D are waiting for their turn, when later in the series the same keypad opens a lock with a PIN code.